If you’ve noticed cabinet paint peeling, chipping, or bubbling in your kitchen, you’re not imagining things, and you’re definitely not alone. Cabinet paint peeling and chipping in San Luis Obispo County kitchens is one of the most common complaints I hear from homeowners who tried a weekend DIY project or hired a contractor who cut corners on prep. The good news is that cabinet painting problems like these are almost always preventable. The reason they happen in the first place usually comes down to a small handful of mistakes made before a single drop of paint ever touched the surface.
Why Cabinet Painting Problems Are So Common
Cabinets are not like walls. They endure more physical contact, heat, moisture, and grease exposure than any other painted surface in a home, and paint that is not properly bonded to the substrate fails under that daily stress. When you paint a wall and miss a prep step, the results might not show up for years. When you paint a cabinet and miss a prep step, the failure often shows up within weeks or months.
Cabinet surfaces are smooth and non-porous, exposed to grease, moisture, and constant handling, and subject to expansion and contraction from temperature changes. That combination makes proper preparation non-negotiable, not optional.
Here in Paso Robles and across San Luis Obispo County, I see this come up constantly on jobs where someone previously tried to go the DIY route or hired a lower-cost painter who didn’t follow a proper system. The kitchen ends up looking worse than it did before, and the homeowner is left paying to have everything stripped and redone correctly.
The 6 Most Common Cabinet Painting Problems (and What Causes Them)
1. Paint Peeling or Flaking Off the Surface
The most common cause of painted cabinets peeling is improper prep work before painting. If you don’t clean, sand, or prime the surface properly, the paint won’t bond and will start peeling sooner than expected.
When paint starts coming off in pieces, especially near edges or corners, it means the bond between coats is failing. You can’t fix this with a touch-up brush. Once adhesion has failed, the only real path forward is to strip back to bare wood and start the prep process over.
What causes it:
| Root Cause | What Happens |
|---|---|
| Surface not degreased | Paint sits on top of oil and grease instead of bonding to wood |
| No sanding before priming | Smooth factory finish gives paint nothing to grip |
| Wrong or no primer used | Paint film can’t bond to the substrate |
| Paint applied in thick coats | Coat dries unevenly and separates over time |
2. Chipping Around Edges, Corners, and Hardware
The paint lifts at the edges. It chips when you close a door a little too firmly. It peels away in sheets when you try to clean it. All because it was never properly bonded to the surface.
Edges and corners are especially vulnerable because they take direct impact every time a door swings open or a drawer gets pulled. If the adhesion isn’t solid all the way to the edge of every door and drawer face, chipping starts fast, often within the first few months of use.
Daily use is a significant cause of peeling paint. High-traffic areas start to look damaged and begin to peel. This includes spots around your silverware drawer and around the knobs or pulls on your most-used drawers and cabinets.
3. Bubbling or Blistering Under the Paint Film
Cracks and blisters often show up first. They may seem small, like fine lines or raised spots, but they’re usually early warnings that the paint underneath is lifting.
Bubbling happens when moisture or air gets trapped between the cabinet surface and the paint layer. Rushing from degreasing to sanding to priming without allowing proper dry time between steps traps moisture and contaminants under your paint layers.
This is why each step in a professional cabinet painting process needs a full dry period before the next step begins. Skipping that wait might shave a day off the job, but it almost always shows up as bubbles or blisters within weeks.
4. Using the Wrong Primer
Using the wrong primer, or no primer at all, accounts for a large share of cabinet paint failures. Standard drywall primer doesn’t bond to the slick factory finishes on most kitchen cabinets.
This is one of the mistakes I see most often on DIY jobs. A homeowner grabs a can of primer off the shelf at a hardware store, applies it to cabinets that haven’t been fully deglossed, and assumes the job is set up correctly. It isn’t. Cabinet surfaces require a high-adhesion bonding primer specifically formulated for slick, non-porous surfaces, not a standard wall primer.
Primer is not optional in cabinet refinishing. It is the foundation of the entire system.
5. Using Wall Paint Instead of Cabinet-Grade Paint
Using wall paint on your cabinets will backfire. Cabinets need coatings that are durable, adhere well, and withstand frequent cleaning. Softer paints wear down faster and lose their grip, especially in high-use areas like doors and drawer fronts.
For long-lasting painted cabinets, always use high-quality, cabinet-grade paint such as acrylic enamel, oil-based, or urethane-modified formulas. These paints are specifically designed to withstand daily wear and resist peeling.
The team at Trombley Painting Company uses Sherwin-Williams Emerald Trim Enamel and Pro Acrylic Urethane on cabinet projects, products that are built for exactly the kind of daily abuse a kitchen delivers.
6. Rushing the Cure Time
When painting kitchen cabinets, professional painters recommend waiting for cabinets to fully cure before use. Keep in mind that curing is different from drying. Just because newly painted cabinets look and feel dry does not mean they are cured all the way through. Paint can dry in a few hours, but curing can take several days.
If you use your cabinets too soon after painting, you can damage the surface in ways that make it more susceptible to peeling and chipping. Cure time is not a suggestion; it is the final step that determines whether the whole system holds up under real-world conditions.
How Long Should Cabinet Paint Actually Last?
This question comes up often, especially from homeowners in Templeton and Atascadero who have had cabinet paint fail in under a year and want to know if that’s normal. It is not.
On average, professionally painted cabinets last 8 to 15 years before needing a full repaint. With proper care, they can last even longer.
Professionally painted cabinets with proper preparation, quality products, and correct application should last 7 to 10 years or more before needing repainting. If you’re seeing chipping, peeling, or significant wear within the first 1 to 2 years, something went wrong with the original application. The three mistakes- poor prep, wrong products, or rushed curing- are almost always the culprits behind early failure.
| Application Type | Expected Lifespan |
|---|---|
| Professional with high-adhesion system | 8 to 15 years |
| DIY with proper products and prep | 5 to 8 years |
| DIY or cheap contractor, rushed prep | 1 to 3 years |
| Wall paint or no primer used | Less than 1 to 2 years |
If painted cabinets are peeling within a few years, something went wrong: either the wrong product was used, or the prep work was cut short. That’s not a judgment; it’s just how paint adhesion works on cabinet-grade surfaces.
What to Do If Your Cabinets Are Already Peeling or Chipping
The most important thing to understand: spot touch-ups rarely work for cabinet painting problems. If your cabinet paint is chipping within the first year or two, touch-ups won’t solve the underlying problem. Chipping this early indicates an adhesion failure, which means the paint never properly bonded to the surface. Touch-ups will look patchy and will likely chip off just as quickly as the original paint.
For widespread cabinet paint peeling, refinishing the affected doors and frames as a complete system is usually the better long-term choice. Spot repairs can stand out, particularly on white cabinets or darker colors with a smooth, low-sheen finish.
Here is what a proper refinishing process should include:
That process is not something you can shortcut. Every step builds on the one before it. Our cabinet painting service follows a structured five-day system that treats each of these phases as a separate workday, because they genuinely need to be.
Why the Right Sheen Choice Also Matters
Sheen plays a bigger role than most homeowners realize. Many cabinet painting problems stem from paint applied in a flat or low-sheen finish that can’t withstand the daily wiping, moisture, and contact kitchen cabinets experience. Choosing a semi-gloss or satin finish adds durability while making cabinets easier to clean, protecting them from moisture, grease, and everyday use.
If you want to read more about how sheen choices affect durability and long-term performance, our post on interior paint finishes and sheen selection covers this in detail.
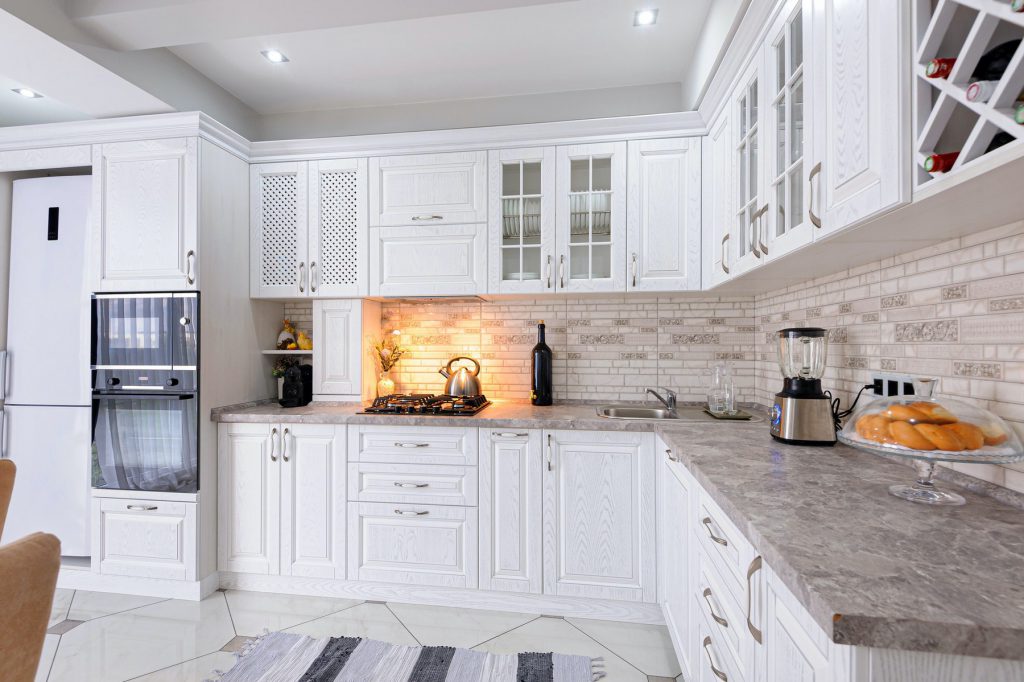
How Trombley Painting Handles Cabinet Projects Differently
I’ve seen what happens when cabinet painting problems pile up: paint that peels, finishes that chip, and homeowners who feel like they wasted their money. That’s why our team follows a process built to prevent those problems from the start, not patch them after the fact.
Here is how our five-day cabinet painting process is structured:
Every project comes with clear daily updates by phone or text, photos of progress, and a No-Surprise Guarantee, what we quote is exactly what you pay. The finished project is backed by a 3-year workmanship warranty, with additional product warranties from the manufacturer.
We serve homeowners across Paso Robles, Atascadero, San Luis Obispo, Templeton, and Morro Bay. Whether you’re dealing with active cabinet painting problems right now or want to get your kitchen done right the first time, the process is the same.
How to Keep Cabinet Paint Looking Good After the Job Is Done
Even a properly done cabinet paint job benefits from some basic care habits. Here is what makes the biggest difference over time:
| What to Do | Why It Helps |
|---|---|
| Wipe spills immediately, especially near the sink and dishwasher | Moisture left sitting weakens the paint film and causes bubbling |
| Clean with a soft cloth and mild soap only | Harsh chemicals like bleach and ammonia break down paint finishes |
| Avoid hanging wet towels or rags on cabinet doors | Prolonged moisture contact leads to peeling at contact points |
| Don’t slam cabinet doors | Repeated impact chips paint at the edges and corners |
| Keep the range hood running while cooking | Reduces steam and grease buildup on cabinet surfaces near the stove |
Water in large amounts can cause extreme damage to your cabinets. When water absorbs into the wood, it begins to expand. Water can cause the paint to bubble or peel, ruining your cabinets’ quality.
For more on how our team approaches surface prep before any painting project, including why thorough cleaning before painting matters so much, read our post on why we always pressure wash before painting, the same prep philosophy applies to cabinet work.